Table of Contents
2. Step-by-Step of LED Strip For Mirror Installation Guide
2.1. Step 1: Measure the Mirror
2.2. Step 2: Cut the LED Strip For Mirror (if necessary)
2.3. Step 3: Clean the Surface
2.4. Step 4: Attach the LED Strip For Mirror
2.5. Step 5: Connect the Power Supply
2.6. Step 6: Test the LED Strip For Mirror
2.7. Step 7: Final Adjustments
3. Tips for Optimal Installation
If you’re looking to enhance the ambiance and functionality of your bathroom or vanity area, installing an LED strip for your mirror is a fantastic choice. Not only does it provide beautiful lighting, but it also adds a modern touch to your space. This guide will walk you through the steps of installation, ensuring you achieve a professional look with your LED strip for mirror setup.

1.Tools and Materials Needed
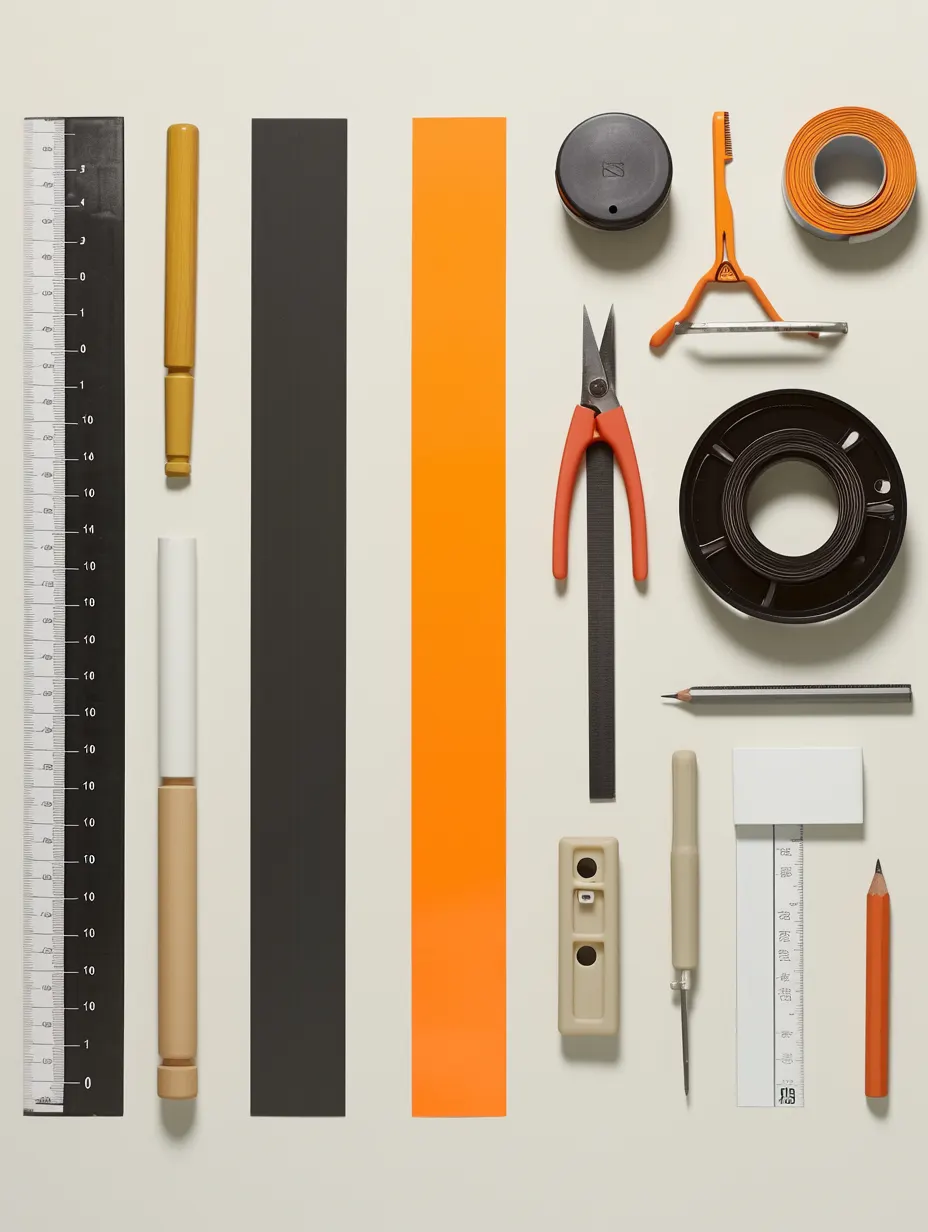
Before you begin, gather the following tools and materials:
- LED strip for mirror
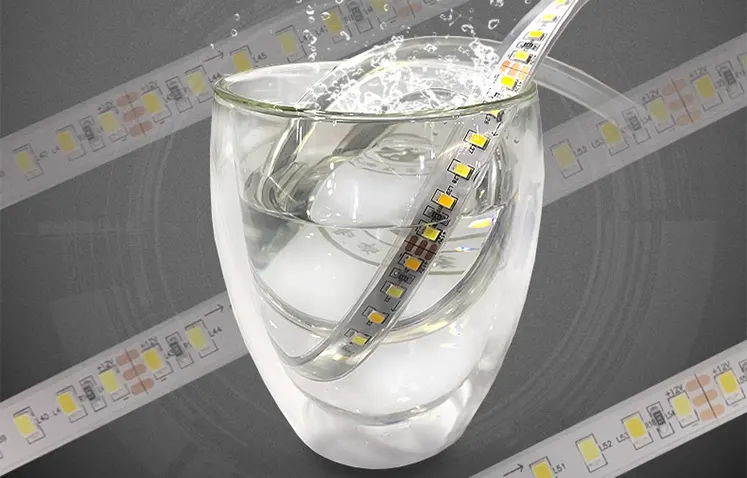
Choose an LED strip that is suitable for your mirror in terms of length, brightness, and color temperature. You should also consider factors like waterproofing (IP rating) if your mirror is located in a bathroom. The right LED strip ensures even lighting and fits your design preferences.
- Power supply or driver
The power supply, also known as a driver, is essential for providing the necessary voltage and current to the LED strip. Make sure you select a compatible driver that matches the power requirements of the LED strip to avoid any issues like flickering or damage.
- Measuring tape
A measuring tape helps you accurately measure the dimensions of your mirror to determine how much LED strip you will need. Precise measurements ensure you buy the right length of LED strip and avoid cutting too much or too little.
- Scissors (if cutting is necessary)
If your LED strip is longer than required, scissors will help you trim it to the correct length. Ensure that the LED strip is designed to be cut at specific intervals, marked on the strip, to avoid damaging the circuit.
- Ruler
A ruler comes in handy for ensuring straight and precise cuts, especially when marking the locations where the LED strip will be applied. It also helps in positioning the LED strip evenly on the mirror’s edge for a neat appearance.
- Level
A level ensures that the LED strip is installed evenly across the mirror’s edges. This tool is important for avoiding slanted or uneven lighting, which could affect the overall aesthetic and function of the mirror.
- Cleaning cloth
Before installing the LED strip, you need to clean the mirror’s surface to ensure proper adhesion. A cleaning cloth removes dust, fingerprints, and debris, allowing the adhesive backing of the LED strip to stick securely.
- Pencil
A pencil is useful for marking reference points on the mirror or wall during the installation process. You can mark where the LED strip will be applied, ensuring accurate placement before securing the strip.

2.Step-by-Step of LED Strip For Mirror Installation Guide
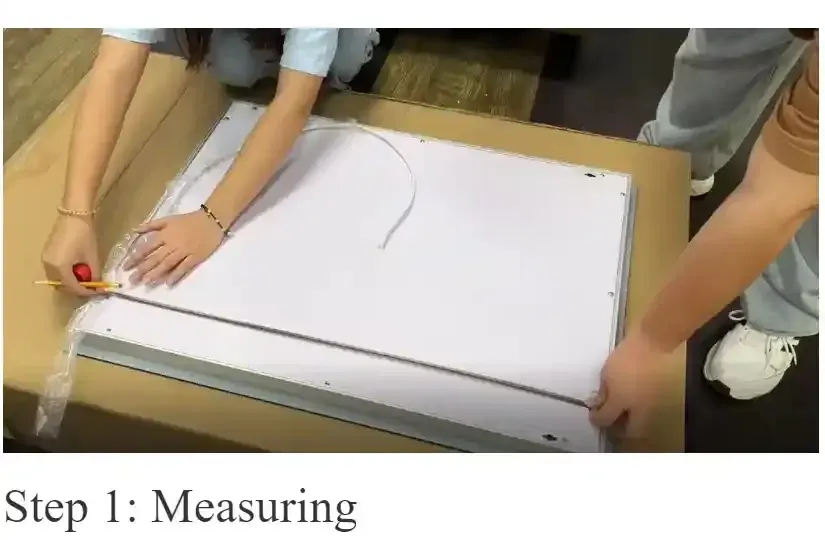
2.1 Step 1: Measure the Mirror
Start by measuring the dimensions of your mirror LED Mirror. This will help you determine how much LED strip you’ll need. Consider the height at which you want to install the mirror with LED strip lights, as it can affect the light distribution and overall aesthetic.
For round mirrors, use a measuring tape to measure the diameter. Begin at one edge of the mirror, measure straight across through the center, and end at the opposite edge. This will give you the total circumference of the mirror, which you can use to calculate the length of LED strip needed by multiplying the diameter by 3.14 (π).
For irregular-shaped mirrors, measure the perimeter by gently following the edge of the mirror with a flexible measuring tape. Make sure to account for any curves or angles to ensure that you purchase the correct length of LED strip to fit the entire outline of the mirror.

2.2 Step 2: Cut the LED Strip For Mirror (if necessary)
Before applying the LED strip, measure your mirror again to confirm how much LED strip you’ll need. If the strip is longer than required, use scissors to cut it at the designated points marked on the strip. Always cut along these marked lines to avoid damaging the LEDs. Some flexible LED strips allow you to bend them around corners, making it easier to create a seamless look even on mirrors with curved or angled edges.

2.3 Step 3: Clean the Surface
After cutting the LED strip to the correct length, clean the area where it will be applied. Use a cleaning cloth to remove any dust, grease, or debris that could interfere with the adhesive. The surface should be smooth, dry, and free of any particles to ensure a strong bond between the mirror and the LED strip.
2.4 Step 4: Attach the LED Strip For Mirror
Peel off the adhesive backing from the LED strip and carefully stick it to the mirror. Depending on the type of mirror—framed or frameless—you may choose different attachment points, each offering a unique lighting effect.
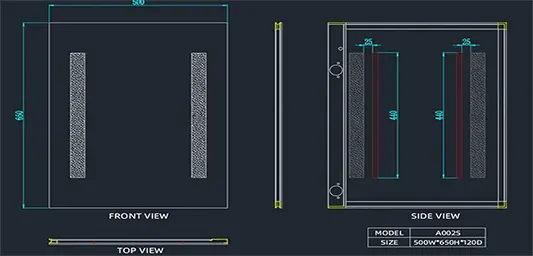
For frameless mirrors, attaching the LED strip directly to the back of the mirror can create a clean, modern look with a soft glow around the edges. Place the strip about one inch from the edge for an even distribution of light. This positioning enhances the mirror’s appearance without being too overpowering.
With framed mirrors, you have the option of placing the LED strip in different positions. Attaching the strip to the back of the frame will create a beautiful backlighting effect, casting a subtle halo of light on the surrounding wall. Alternatively, you can place the LED strip along the outer or inner edge of the frame for a more direct lighting effect, which can accentuate the mirror’s frame and add a stylish touch.
In both cases, ensure that you use a level to keep the LED strip straight, and press firmly to guarantee good adhesion. The placement of the LED strip not only influences the visual effect but also how well it illuminates the space, so choose the location based on the atmosphere you want to create.
2.5 Step 5: Connect the Power Supply
Connect the LED strip for mirror to the power supply. Ensure the connections are secure. If your mirror with LED strip lights requires a driver, follow the manufacturer’s instructions for installation.
2.6 Step 6: Test the LED Strip For Mirror
Once everything is connected, turn on the power to test the LED light strips for mirror LED. If everything is working correctly, you’re all set!
2.7 Step 7: Final Adjustments
Make any necessary adjustments to the positioning of the LED strip for the mirror to ensure optimal lighting. Consider using diffusers or frosted coverings to further soften the light and enhance the overall visual effect.
Diffusers: These are typically made of clear or semi-transparent materials that are placed over the LED strip. They help spread the light evenly across the surface, reducing harsh shadows and glare. By using a diffuser, the light becomes more uniform, creating a smooth and consistent glow around the mirror. This is ideal for achieving a softer, more refined lighting effect, especially in bathrooms or makeup areas where balanced illumination is crucial.
Frosted Coverings: Frosted coverings take light diffusion a step further by creating a more subtle, ambient effect. These coverings tend to obscure the individual LED lights, giving the impression that the entire strip is glowing softly rather than showing distinct points of light. This results in a gentle, diffused glow that enhances the mirror’s appearance without overwhelming the space, making it perfect for creating a calm, elegant atmosphere.
Both options can transform the harsh brightness of bare LED strips into a more visually pleasing light, making your mirror setup feel professional and sophisticated.
3.Tips for Optimal Installation
- Plan Your Layout: Consider how you want the mirror with LED strip lights to look when it’s turned on. You can place the strips in a pattern or along the edges for a more defined look. Using two strips at different heights can create a layered lighting effect. For accent lighting, strips emitting 80-100 lumens per foot can give a subtle, ambient glow that is perfect for creating a calm, relaxing atmosphere in the bathroom or bedroom. For a more functional task light, such as for shaving or makeup application, aim for strips with 350-500 lumens per foot to provide bright, clear illumination around the mirror.
- Choose the Right Color Temperature: The color temperature of your LED strips plays a significant role in setting the mood. For a warm, intimate ambiance, like in a cozy bathroom or bedroom, use strips with a temperature range of 2700K-3000K (warm white). This creates a soft, welcoming light that mimics the warmth of incandescent lighting. For a more functional and modern look, such as in a workspace or contemporary bathroom, choose strips in the 4000K-5000K range (natural to cool white), which provides a brighter, cleaner appearance. Cool white lighting (5000K) is especially great for large mirrors in modern bathrooms where crisp visibility is required.
- Use a Dimmer: Installing a dimmer switch allows you to control the brightness, making it easy to adjust the mood. This is particularly useful if you want flexibility in the space—lower the brightness for a relaxing bath with dim, cozy lighting or raise it for tasks that require precision, such as makeup application or grooming.
- Check Compatibility: Ensure that your LED light strips for mirror LED are compatible with the power supply to avoid any electrical issues. Look for products that include features like overheat protection and voltage stabilization for added safety. Additionally, in humid areas like the bathroom, make sure the LED strips have an IP65 rating to protect against water damage.

4.Conclusion
Installing an LED strip for mirror can significantly enhance your space’s aesthetics and functionality. By following this guide, you can achieve a sleek and modern look that suits your style. For more information on our products, click here to explore the range of LED mirrors offered by Aosmay.
If you’re interested in further enhancing your bathroom or vanity space, check out these related articles for additional insights and tips:
LED Mirror Vanity: A Comprehensive Guide
Bathroom LED Mirrors: A Smart Choice
For further reading, check out Wikipedia on LED lighting for more in-depth information on LED technology.